Today I'll show you guys how to change kali linux terminal header text.
SMTP Protocol:
Index:
- What is SMTP?
- How it works.
- How to send (fake) email through an SMTP server.
- How to add subject, etc. in mail.
- Attachments.
- Fully functional Mailer.java
1. What is SMTP?
SMTP stands for "Simple Mail Transfer Protocol". It is a fairly simple
protocol (hence the name!) used to send and relay email through the Internet.
The protocol is implemented on mail servers, like Sendmail or Postfix.
These servers usually listen on port 25[*].
It is a clear-text protocol, meaning a human can connect to such a server and
issue the commands manually. This also means the message can be sniffed as it
is sent without encryption to the server.[*] What is a port? You may be aware of the comm and parallel ports on your
computer, that you might connect a modem and printer to. There are also many
software ports on your computer, identified by numbers, which various services
run on. For example, to receive a web page, your computer contacts the server
on port 80. For a complete list of ports and the services to expect running
on them, go here: http://xhz.freeshell.org/files/ports.txt, or you can find
a list on your machine if you're running *nix at /etc/services, or on Windows
NT and XP at C:\winnt\system32\drivers\etc\services, or Win 9x and ME at
C:\windows\services.
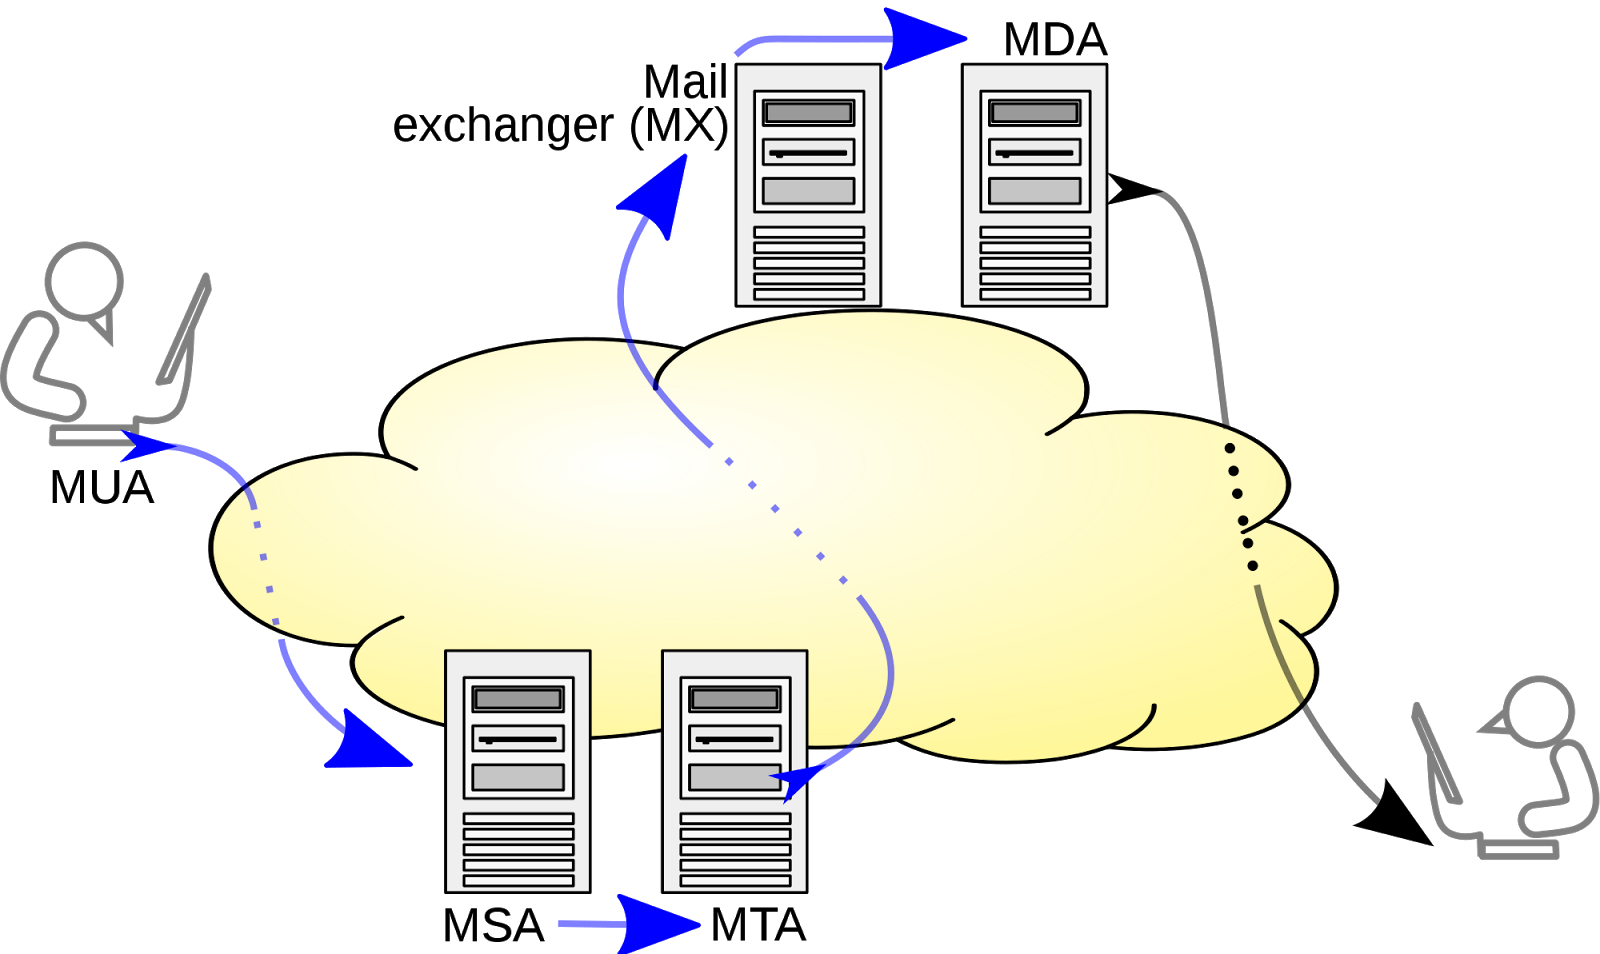
2. How it works
An SMTP server acts as a daemon, that is it listens for input. Once someone
has made a connection it wakes up and is ready to receive whatever the client
has for it.
When you send an email, you send it to an SMTP server, which looks at the
intended recipient, and if that address does not exist on the server's local
network, passes it on to another server. The process repeats until the
message reaches its destination, where it is either sent locally to the
recipient's inbox, or stored in a POP (see POP3 tutorial) or IMAP server for
the recipient to pick up there.
A good way to understand this is to look at the full headers of any email.
There are many different ways to do this depending on your mail client, for
example on Outlook Express[*] right-click the message, select properties, and
under the details tab click "Message Source". That stuff at the top is the
headers, it shows all the SMTP servers the message has been through!
Here is an example:
Return-Path: <foo@bar.com>
Received: from mta02-svc.bar.com (mta02-svc.bar.com [65.53.126.24])
by otaku.freeshell.org (8.11.3/8.11.6) with ESMTP id g6CHe9v12447
for <xhz@NOSPAMsdf.lonestar.org>; Fri, 12 Jul 2002 17:40:09 GMT
Received: from foo ([212.45.97.29]) by mta02-svc.bar.com
(InterMail vM.4.01.03.27 201-229-121-127-20010626) with SMTP
id <20020712174016.PIOZ290.mta02-svc.bar.com@foo>
for <xhz@NOSPAMsdf.lonestar.org>; Fri, 12 Jul 2002 18:40:16 +0100
Message-ID: <000701c229cb$3967d080$31610050@foo>
Reply-To: "Joe Nobody" <foo@bar.com>
From: "Joe Nobody" <foo@bar.com>
To: "X-Hz" <xhz@NOSPAMsdf.lonestar.org>
References: <Pine.LNX.4.33.0207121818300.1559-100000@localhost.localdomain>
Subject: Email test
X-Mailer: Microsoft Outlook Express 5.50.4133.2400
So, what can we tell from these headers? Lots! More on them later! For now, we
can see that the message had a short route, from foo (212.45.97.29) to
mta02-svc.bar.com to otaku.freeshell.org. The message passed through all these
hosts' SMTP servers! [*] Please don't use that, try Eudora or something else that isn't made by
Microsoft! Even better, get *nix and use pine/mutt!
3. How to send (fake) mail manually through an SMTP server.
When you send an email using a client, all it does is contact the SMTP server
and sends it the details. Since as I mentioned earlier it is a clear-text
protocol, we can telnet to the server and send it manually! And if that's too
tedious for you, there's also some sample Java code[*] for you too look at and
perhaps modify/use!
Usually, when you telnet to a remote server, you just type "telnet
some.server.com" and you get a "login:" screen. Almost all telnet clients
allow you to connect to any port, simply by giving the port number after the
server name, eg. "telnet some.server.com 25" would contact port 25, the SMTP
daemon.
So, once you have found an SMTP server (try smtp.<yourisp.com> or
mail.<yourisp>.com) you are ready, telnet in using the command I gave above.
You will be greeted with something like this:
220 somehost.somedomain ESMTP Sendmail 8.11.6/8.11.6; Thu, 25 Jul 2002 11:47:07
+0100
This means you have connected to the server, and it is ready for your input.
So, lets have a look at available commands by typing help
This is sendmail version 8.11.6
Topics:
HELO EHLO MAIL RCPT DATA
RSET NOOP QUIT HELP VRFY
EXPN VERB ETRN DSN AUTH
STARTTLS
For more info use "HELP <topic>".
To report bugs in the implementation send email to
sendmail-bugs@sendmail.org.
For local information send email to Postmaster at your site.
End of HELP info
To send an email, all we'll need are the helo, mail, rcpt and data commands.
Ok, let's send!
In normal conversation, it is polite to start with a "hello". Well in our
conversation with the server we'll be polite too!
helo foobar.com
What you are doing here is introducing yourself by giving your hostname
(foobar.com) to the server. If you don't have a hostname, it's ok to use your
ip address. The sendmail programs these days are not fooled by giving a false
hostname, they still include your proper one in the email headers.
Once you have typed your helo, hit return, you should get a reply like this:
250 somehost.somedomain Hello foobar.com [212.68.131.95], pleased to meet you
The server responds with their hostname, and a friendly hello!
Now we specify who the message is from:
mail from:joe@boring.com
and get the answer:
250 2.1.0 joe@boring.com... Sender ok
Now we give the recipient's address with:
rcpt to:john@dull.net
and the server responds with:
250 2.1.5 john@dull.net... Recipient ok
Now, for the body of the message, give:
data
and the server should say:
354 Enter mail, end with "." on a line by itself
Now we enter the message, and follow the server's instructions at the end. You
should then get something like:
250 2.0.0 g75C0fP05173 Message accepted for delivery
And that's it! Your message will be sent! Now just type quit to finish.
The thing about SMTP servers is that there is no authentication involved, so
we could just as easily have identified ourself as billgates@microsoft.com or
anything! I'll leave it to you to figure out what you could do knowing this!
Manually telnet-ing can get very tedious, but luckily sending mail is very
easy to implement in java with the help of the javamail api.
We'll look at the basics of a simple mail-sending java program. I'll assume
some previous knowledge of Java.
------------------------------<CUT> here------------------------------------


import javax.mail.*;

import javax.mail.internet.*;

import java.util.Date;

import java.util.Properties;


public class Mailer

{

public static void main(String[] args)

{

Properties mailProp = System.getProperties();

// replace the xx.xx.xx.xx with a valid SMTP server

mailProp.put("mail.smtp.host", "xx.xx.xx.xx");

Session mailSession = Session.getDefaultInstance(mailProp, null);

try {

MimeMessage mailMessage = new MimeMessage(mailSession);

// replace the addresses, subject and message with whatever

mailMessage.setFrom(new InternetAddress("person@from.com"));

mailMessage.setRecipients(Message.RecipientType.TO ,

InternetAddress.parse("some1@to.com", false));

MimeBodyPart mimeBody = new MimeBodyPart();

mimeBody.setText("This mail was brought to you by Java\nGoodbye");

Multipart multipart = new MimeMultipart();

multipart.addBodyPart(mimeBody);

mailMessage.setContent(multipart);

mailMessage.setSentDate(new Date());

Transport.send(mailMessage);

System.out.println("One mail sent successfully...");

} catch (MessagingException mailEx) {

System.err.println("Error :\n");

mailEx.printStackTrace();

System.err.println("\n\nCouldn't send mail...");

}

}

}


------------------------------</CUT> here-----------------------------------
This is all that is needed to send an email using the JavaMail API. Most of
the code is self-explanatory, but I'll go through some less obvious lines.
The first four lines set up our imports (similar to #include in C) so the
program has all the appropriate classes available to it. java.util.Date
is needed for when we date-stamp the message and java.util.Properties is
needed to get the system properties.
mailProp.put("mail.smtp.host", "xx.xx.xx.xx");
This line specifies the smtp server to use, in this case xx.xx.xx.xx
We then begin our mail session with line 12.
Now, the JavaMail API uses the MIME system to construct and send its mail
(more on MIME later). This means we have to construct our message in a MIME
format. This is achieved in a few steps.
First, we create the mime-message with the MimeMessage class, and add
the email addresses for the sender and any recipients. This is all fairly
self-explanatory in lines 15-19.
Then, for the body of the message, we use the MimeBodyPart class, with the
setText() method (see lines 20-21).
We now create the Multipart class needed to put our body-part in
(lines 22-23).
Now we simply set the content of our message to be the multipart class we
created, with
mailMessage.setContent(multipart);
All that's left is to set the date as in line 25, and then use the
Transport class to attempt to send the message! Et voila!
As you can see, it is fairly simple to send mail, we can even create a program
to send a message with only a few lines of code!
Hopefully you now understand the trusting, insecure nature of SMTP, and how
easy it is to forge mail. With hard-coding you can go even further, for
example by messing with the Date and Calendar classes, you can easily forge a
sent date! I'll leave you to go figure what other mischief you can get up to![*] All the sample code here is in Java. To find out more about Java, or to get
yourself a copy of the development kit, go to Oracle Technology Network for Java Developers | Oracle Technology Network | Oracle
Also, the code I've written makes use of the JavaMail API, which is also
freely available. Search Google for more info!
4. How to add subject, etc. in mail.
If you send a message to yourself like above, you'll notice it is very plain
and boring, it won't even have a subject! How would we go about adding things
like a subject line, or even extra headers (evil grin) or MIME-encoded
attachments?
All of these things are simply done in the message body, after the data
command.
When you look at the source (headers) of an email you see the subject line
like this:
Subject: smtp tutorial
There is no fancy SMTP command to construct this, you just type it in like
that in the data part of your message!
It is also easy done in java, simply add
mailMessage.setSubject("some subject");
to your code!
You might want to add other things that you see in the headers of your email,
these can all be done in a similar manner. So, you just had a thought about
using headers to protect yourself from being tracked? Well this won't fool
anyone with email header experience, as you're extra headers will come below
the message id, making it easy to separate them from the real ones!
If you've been looking for a command to specify cc recipients, again there's
no command. Of course, there's nothing to stop you from specifying multiple
mail from: lines, or alternatively in the data part add a line with CC:
with the extra recipients.
Or if you're using Mailer.java, you can add more recipients with more
addRecipients() methods, though for CC's it will look like this:
mailMessage.setRecipients(Message.RecipientType.CC ,
InternetAddress.parse("cc@address.com", false));
For a list of all the MimeMessage and all JavaMail class' methods, go to:
http://java.sun.com/products/javamail/javadocs/
5. Attachments.
First I'll explain how attachments are sent in an email. They are not just
sent as-is, they are encoded/compressed first using Base64 encoding, and are
sent using a system called MIME (Multipurpose Internet Mail Extensions).
The message is then sent, divided into a plain text part, and any encoded
parts.
Let's look at the raw source of an email with a MIME attachment to see how it
works:
From xhz@NOSPAMsdf.lonestar.org Mon Aug 5 2132 2002
Return-Path: <xhz@NOSPAMsdf.lonestar.org>
Received: from localhost (xhz@localhost)
by localhost.localdomain (8.11.6/8.11.6) with ESMTP id z75QvWo57473
for <xhz@localhost>; Mon, 5 Aug 2002 2132 +0100
Date: Mon, 5 Aug 2002 2132 +0100 (BST)
From: X-Hz <xhz@NOSPAMsdf.lonestar.org>
To: <xhz@localhost.localdomain>
Subject: Attached binary
Message-ID: <038805519620.7375-101000@localhost.localdomain>
MIME-Version: 1.0
Content-Type: MULTIPART/MIXED; BOUNDARY="mailboundary"
Status: 0
This message is in MIME format. The first part should be readable text,
while the remaining parts are likely unreadable without MIME-aware tools.
--mailboundary
Content-Type: TEXT/PLAIN; charset=US-ASCII
blah blah blah....
--mailboundary
Content-Type: APPLICATION/octet-stream; name=abc
Content-Transfer-Encoding: BASE64
Content-Disposition: attachment; filename=abc
f0VMRgEBAQAAAAAAAAAAAAIAAwABAAAAkIMECDQAAABgKwAAAA AAADQAIAAG
ACgAHgAbAAYAAAA0AAAANIAECDSABAjAAAAAwAAAAAUAAAAEAA AAAwAAAPQA
AAD0gAQI9IAECBMAAAATAAAABAAAAAEAAAABAAAAAAAAAACABA gAgAQIgAYA
AIAGAAAFAAAAABAAAAEAAACABgAAgJYECICWBAgUAQAALAEAAA YAAAAAEAAA
AgAAAMwGAADMlgQIzJYECMgAAADIAAAABgAAAAQAAAAEAAAACA EAAAiBBAgI
gQQIIAAAACAAAAAEAAAABAAAAC9saWIvbGQtbGludXguc28uMg AABAAAABAA
AAABAAAAR05VAAAAAAACAAAAAgAAAAUAAAADAAAACQAAAAcAAA ADAAAACAAA
AAAAAAAAAAAAAQAAAAIAAAAAAAAABAAAAAUAAAAAAAAABgAAAA AAAAAAAAAA
QIYECI2FeP///1DoV/7//4PEEI2FeP///4PADolF8ItF8IA4AHUE6yaJ9otF
8IA4ZXUGi0XwxgBFi0XwgDggdQaLRfDGAAqNRfD/AOvRkIPsCI2FeP///1Bo
ZYYECOjk/f//g8QQuAAAAADJw4n2kJCQkJCQkJBVieVTg+wEoZSWBAi7lJYE
CIP4/3QWjXYAjbwnAAAAAIPrBP/QiwOD+P919FhbXcNVieWD7AiJ7F3DjbYA
AAAAVYnlU1LoAAAAAFuBw8oQAACNdgDo9/3//4td/MnDAAAAAAAAAAAAAAAA
AAAAAAAAAwAAAAEAAgAAAAAAAAAAAAAAAAAAAAAAAAAAAAAAAA AlYyVjJWMg
IABBQkMAJXMgICVjJWMlcwoAAAAAAAAAAHNoZSBzZWxscyBzZW Egc2hlbGxz
IGJ5IHRoZSBzZWFzaG9yZQAlcwoAAAAAAAAAAAAAAAAAAAAAAA AAAAAAAAAA
AAAAAAAAAKCWBAgAAAAAAAAAAP////8AAAAA/////wAAAADMlgQIAAAAAAAA
AAA2gwQIRoMECFaDBAhmgwQIdoMECIaDBAgAAAAAAQAAABAAAA AMAAAACIME
CA0AAADQhQQIBAAAACiBBAgFAAAA8IEECAYAAABggQQICgAAAI YAAAALAAAA
EAAAABUAAAAAAAAAAwAAAKSWBAgCAAAAMAAAABQAAAARAAAAFw AAANiCBAgR
AAAA0IIECBIAAAAIAAAAEwAAAAgAAAD+//9voIIECP///28BAAAA8P//b4yC
BAgAAAAAAAAAAAAAAAAAAAAAAAAAAAAAAAAAAAAAAAAAAAAAAA AAAAAAAAAA
GQAAgAA4AAAAAAA5GQAAgAA5AAAAAABTGQAAgAA6AAAAAAAAAA AAogAAAAAA
AABtGQAAIAAZAAAAAAAAAAAAZAAAALSDBAgAaW5pdC5jAC91c3 Ivc3JjL2J1
aWxkLzQ1NDIzLWkzODYvQlVJTEQvZ2xpYmMtMi4yLjQvY3N1Lw BnY2MyX2Nv
bXBpbGVkLgBpbnQ6dCgwLDEpPXIoMCwxKTstMjE0NzQ4MzY0OD syMTQ3NDgz
NjQ3OwBjaGFyOnQoMCwyKT1yKDAsMik7MDsxMjc7AGxvbmcgaW 50OnQoMCwz
KT1yKDAsMyk7LTIxNDc0ODM2NDg7MjE0NzQ4MzY0NzsAdW5zaW duZWQgaW50
OnQoMCw0KT1yKDAsNCk7MDAwMDAwMDAwMDAwMDswMDM3Nzc3Nz c3Nzc3OwBs
b25nIHVuc2lnbmVkIGludDp0KDAsNSk9cigwLDUpOzAwMDAwMD AwMDAwMDA7
MDAzNzc3Nzc3Nzc3NzsAbG9uZyBsb25nIGludDp0KDAsNik9QH M2NDtyKDAs
Nik7MDEwMDAwMDAwMDAwMDAwMDAwMDAwMDA7MDc3Nzc3Nzc3Nz c3Nzc3Nzc3
Nzc3NzsAbG9uZyBsb25nIHVuc2lnbmVkIGludDp0KDAsNyk9QH M2NDtyKDAs
Nyk7MDAwMDAwMDAwMDAwMDswMTc3Nzc3Nzc3Nzc3Nzc3Nzc3Nz c3NzsAc2hv
SGF0IExpbnV4IDcuMSAyLjk2LTk4KQAAR0NDOiAoR05VKSAyLj k2IDIwMDAw
NzMxIChSZWQgSGF0IExpbnV4IDcuMSAyLjk2LTk4KQAAR0NDOi AoR05VKSAy
Ljk2IDIwMDAwNzMxIChSZWQgSGF0IExpbnV4IDcuMSAyLjk2LT k4KQAIAAAA
AAAAAAEAAAAwMS4wMQAAAAgAAAAAAAAAAQAAADAxLjAxAAAACA AAAAAAAAAB
AAAAMDEuMDEAAAAIAAAAAAAAAAEAAAAwMS4wMQAAAAgAAAAAAA AAAQAAADAx
LjAxAAAACAAAAAAAAAABAAAAMDEuMDEAAAAALnN5bXRhYgAuc3 RydGFiAC5z
aHN0cnRhYgAuaW50ZXJwAC5ub3RlLkFCSS10YWcALmhhc2gALm R5bnN5bQAu
ZHluc3RyAC5nbnUudmVyc2lvbgAuZ251LnZlcnNpb25fcgAucm VsLmR5bgAu
cmVsLnBsdAAuaW5pdAAucGx0AC50ZXh0AC5maW5pAC5yb2RhdG EALmRhdGEA
LmVoX2ZyYW1lAC5jdG9ycwAuZHRvcnMALmdvdAAuZHluYW1pYw Auc2JzcwAu
YnNzAC5zdGFiAC5zdGFic3RyAC5jb21tZW50AC5ub3RlAAAAAA AAAAAAAAAA
AAAAAAAAAAAAAAAAAAAAAAAAAAAAAAAAAAAAAAAbAAAAAQAAAA IAAAD0gAQI
9AAAABMAAAAAAAAAAAAAAAEAAAAAAAAAIwAAAAcAAAACAAAACI EECAgBAAAg
AAAAAAAAAAAAAAAEAAAAAAAAADEAAAAFAAAAAgAAACiBBAgoAQ AAOAAAAAQA
AAAAAAAABAAAAAQAAAA3AAAACwAAAAIAAABggQQIYAEAAJAAAA AFAAAAAQAA
AAQAAAAQAAAAPwAAAAMAAAACAAAA8IEECPABAACcAAAAAAAAAA AAAAABAAAA
AAQAAAAAAAAAywAAAAEAAAAAAAAAAAAAAJQHAACkBwAAGAAAAA AAAAAEAAAA
AF9fZG9fZ2xvYmFsX2N0b3JzX2F1eABfX0NUT1JfRU5EX18AX1 9EVE9SX0VO
RF9fAF9fRlJBTUVfRU5EX18AYWJjLmMAX0RZTkFNSUMAX19yZW dpc3Rlcl9m
cmFtZV9pbmZvQEBHTElCQ18yLjAAX2ZwX2h3AF9pbml0AF9fZG VyZWdpc3Rl
cl9mcmFtZV9pbmZvQEBHTElCQ18yLjAAX3N0YXJ0AF9fYnNzX3 N0YXJ0AG1h
aW4AX19saWJjX3N0YXJ0X21haW5AQEdMSUJDXzIuMABkYXRhX3 N0YXJ0AHBy
aW50ZkBAR0xJQkNfMi4wAF9maW5pAF9fY3hhX2ZpbmFsaXplQE BHTElCQ18y
LjEuMwBfZWRhdGEAX0dMT0JBTF9PRkZTRVRfVEFCTEVfAF9lbm QAX0lPX3N0
ZGluX3VzZWQAX19kYXRhX3N0YXJ0AF9fZ21vbl9zdGFydF9fAH N0cmNweUBA
R0xJQkNfMi4wAA==
--mailboundary--
Wow, that's a lot of data, what was all that? Well most of it is just the
encoded attachment, the rest is quite simple to insert into your manual SMTP
session!
Firstly, once the data command has been issued, we need to specify the version
of MIME we will use; it is safe to just always say "MIME-Version: 1.0" as in
the example. Then we specify the content type so the mail client will know
what to expect, if you have a message and your external non-text attachment
this will be as in the example as well. The "BOUNDARY" is just a tag used
to divide the message into its separate parts, it can be anything you want.
It is helpful to then have a message for any non-MIME clients, saying this
message uses MIME, blah blah etc.
Now, lets get the first part (the standard text) done. Just type it as normal,
with a --mailboundary (or whatever you named your boundary) and another
"content-type:" preceding it. For a list of mime-types, charsets and more go
here:
http://www.isi.edu/in-notes/iana/ass...es/media-types
After we're done typing the standard message you can add another
"content-type:" tag this time for your attachment, be it HTML, a executable
binary, whatever, as long as you specify the filename as in the example.
So how do we get the attachment encoded to all that MSksNjQsMzI7X19 faff?
There are tools to do this, for Windows and Dos there is a tool called
"mime64b", available at:
ftp://ftp.arnes.si/software/simtelne...de/mime64b.zip
PS. Don't complain to me if this tool ain't good, being a *nix-only user I
haven't tried it, I included it here because it comes with the source If
you're unhappy with it then there are plenty of others; search Google!!
Unix users as always don't need an external program, they will most likely
have mimencode (sometimes called mmencode) already on their system. So, you
have your encoder and have encoded your file, now simply paste it into your
telnet window and finish with a "--mailboundary--" on a line of its own, and
the usual "." on its own line and we're done! That's it!
To add attachments to our java program requires an extra few lines.
Firstly we'll need to use the FileDataSource class from the activation package
(see Oracle Technology Network for Java Developers | Oracle Technology Network | Oracle to download and install), so we should
import javax.activation.*;
So, if you look back to Mailer.java line 20, we created a MimeBodyPart class.
To add an attachment we'll need another MimeBodyPart object, so just create
another with a different name of course.
The code to attach the file should be similar to this (assuming the second
MimeBodyPart object is called mimeAttach):
FileDataSource fds = new FileDataSource("/path/to/attachment");
mimeAttach.setDataHandler(new DataHandler(fds));
mimeAttach.setFileName(fds.getName());
Then, we simply add the mimeAttach with the same addBodyPart() method as in
line 23 of Mailer.java, except this time passing mimeAttach as the argument.
And that's all, you now have attachment capabilities in your mail program!
6. Fully functional Mailer.java
If you have been looking at the sample code I've provided, you're probably
thinking it's not very useful to have the email addresses and everything else
hard-coded into it. Well, your right, so I thought I'd spoil you with a fully
functional program that takes all that from user input! Enjoy!
------------------------------<CUT> here------------------------------------


import java.io.*;

import java.util.Date;

import java.util.Properties;

import javax.mail.*;

import javax.mail.internet.*;

import javax.activation.*;


public class Mailer

{

public static void main(String[] args)

{

String from, to, subject, body, attach, server;


/* Getting SMTP server from argument */

if (args.length > 0)

server = args[0];

else {

System.err.println("Warning: "

+ "No server specified. Will try localhost.\n");

server = "none";

}

/* Get details from user input */

System.out.print("Mail From: ");

from = getInput();

System.out.print("Mail To: ");

to = getInput();

System.out.print("Subject: ");

subject = getInput();

System.out.print("Attachment (leave blank for none): ");

attach = getInput();

System.out.println("Enter message body, ending with a \".\" on a line "

+ "by itself.");

body = getBody();


/* Now to construct and send the message */

Properties mailProp = System.getProperties();

if (! server.equals("none"))

mailProp.put("mail.smtp.host", server);

Session mailSession = Session.getDefaultInstance(mailProp, null);

try {

MimeMessage mailMessage = new MimeMessage(mailSession);

mailMessage.setFrom(new InternetAddress(from));

mailMessage.setRecipients(Message.RecipientType.TO ,

InternetAddress.parse(to, false));

mailMessage.setSubject(subject);

MimeBodyPart mimeBody = new MimeBodyPart();

mimeBody.setText(body);

Multipart multipart = new MimeMultipart();

multipart.addBodyPart(mimeBody);

if (! attach.equals("")) {

MimeBodyPart mimeAttach = new MimeBodyPart();

FileDataSource fds = new FileDataSource(attach);

mimeAttach.setDataHandler(new DataHandler(fds));

mimeAttach.setFileName(fds.getName());

multipart.addBodyPart(mimeAttach);

}

mailMessage.setContent(multipart);

mailMessage.setSentDate(new Date());

Transport.send(mailMessage);

System.out.println("One mail sent successfully.....");

} catch (MessagingException mailEx) {

System.err.println("Error :\n");

mailEx.printStackTrace();

System.err.println("\n\nCouldn't send mail...");

}

}


public static String getInput()

{

InputStreamReader reader = new InputStreamReader(System.in);

BufferedReader input = new BufferedReader(reader);

String inputString = null;

try {

inputString = input.readLine();

} catch (IOException e) {

e.printStackTrace();

System.err.println("Error : " + e.toString());

}

return inputString;

}


public static String getBody()

{

String bodyString = "", line;

line = getInput();

while ( ! line.equals(".")) {

bodyString = bodyString.concat(line+"\n");

line = getInput();

}

return bodyString;

}

}


------------------------------</CUT> here-------------------------------------------
So, we've looked at the SMTP protocol, how it works and how to send messages
with subjects, extra headers and even attachments manually through a telnet
session! And we've looked at implementing a mail-sender in Java!
That's all for this text!
Happy Hacking
Comments
Post a Comment